
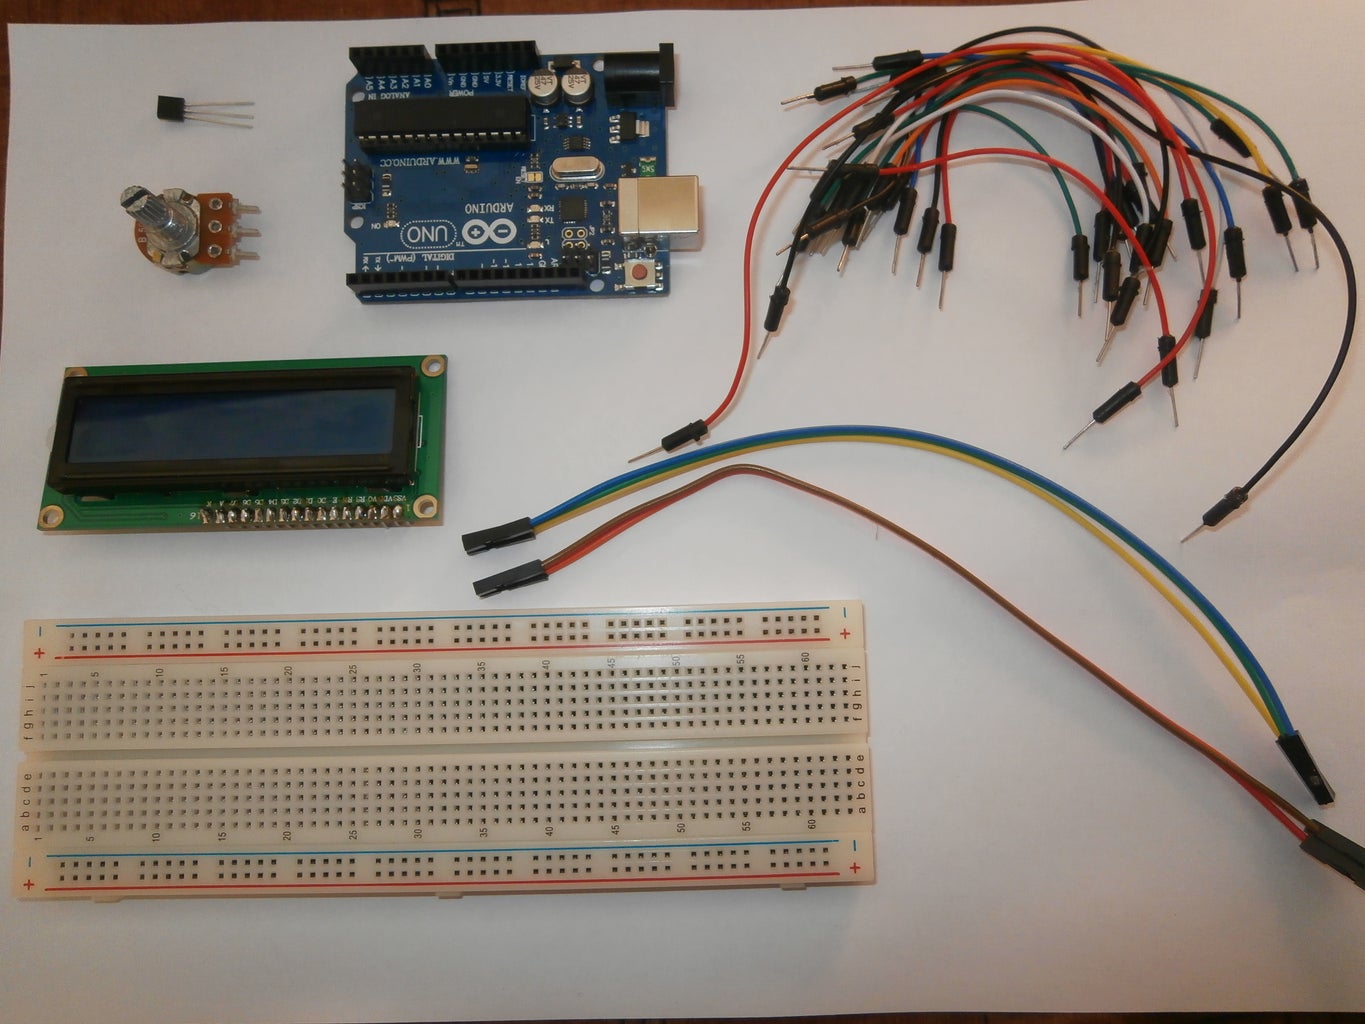
DIY Digital Thermometer 4 Steps Circuit Diagram Hello, friends! In this video, I show you how to make my version of the Digital Thermometer, this device displays temperature in °C and displays the humidity I'm going to show you how to make an LCD thermometer with an Arduino UNO and a LM35/36 analog temperature sensor with jumpers and a breadboard. connect the left and the right pins of the pot to ground and +5V and the middle one to the LCD display. (12, 11, 5, 4, 3, 2); //Digital pins to which you connect the LCD const int inPin = 0

IntroductionA Digital Thermometer is a practical project that demonstrates how to measure and display temperature using electronic components. This project is an excellent introduction to interfacing sensors with microcontrollers and displaying data on an LCD. In this tutorial, we will build a Digital Thermometer using an Arduino, a temperature sensor (LM35), and an LCD display. In this video i will show you how to make a digital thermometer using Arduino uno and LM35 Temperature sensor and LCD displayfor circuit diagram visit my web Digital Thermometer With Arduino: This project uses an Arduino, a DS18B20 temp sensor, and a 16x2 LCD display to show the current air temperature. It can be made with or without a breadboard, but a breadboard makes it much easier to wire. It shows the temperature in Fahrenheit, but …
Digital Thermometer with Arduino & LM35 Temperature Sensor Circuit Diagram
Output on LCD display. After uploading the code put the sensor thermocouple into some hot area or flame to check the readings on the LCD display. You can see the display like below image. Build Digital Thermometer using LM35 and Arduino. by CircuitSchools Staff. July 13, 2020. Arduino Projects; ESP32 Projects; IOT Projects; Circuit digram for Digital Thermometer using Arduino and LM35 Temperature Sensor , is shown in the above figure. Make the connections carefully as shown in the schematic. Here 16x2 LCD unit is directly connected to arduino in 4-bit mode. Data pins of LCD namely RS, EN, D4, D5, D6, D7 are connected to arduino digital pin number 7, 6, 5, 4, 3, 2.
Use the potentiometer to adjust the contrast of the LCD display for better visibility. You can also customize the code to add additional features, such as high/low temperature alerts or temperature logging. Benefits of DIY digital thermometer with Arduino. There are several benefits to making your own digital thermometer with Arduino:
